Fall One Room Challenge: Week 5

This project was created in a partnership with the One Room Challenge Sponsors!  

Hey Guys!! Things are getting really real over here in the One Room Challenge! I can’t believe there is just one week left. I would be lying if I didn’t admit that I love the pressure of pulling everything together at the last minute. Maybe it is my personality, or maybe the excitement of pulling it all out just in time.

Let me give  you a little refresher if you haven’t seen my design board in a while. Here is my original plan for my Entryway.

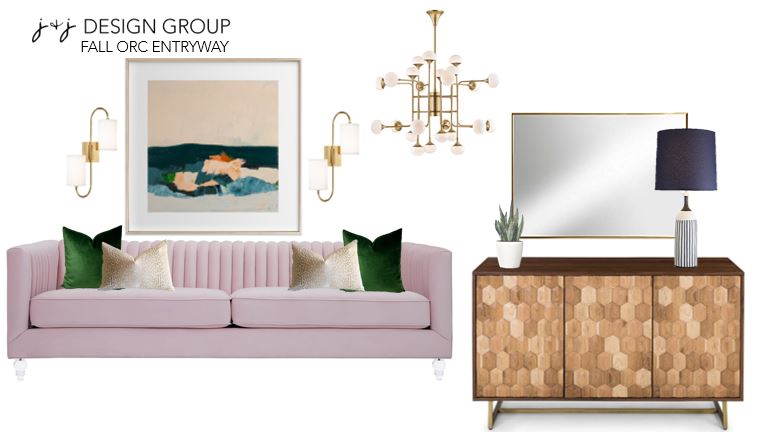
Chandelier: Hudson Valley Lighting -Sofa: Hayneedle – Sideboard: Article

Sconces: Hudson Valley Lighting -Artwork: Minted -Lamp: LampsPlus


There are just a few changes that happened in real life but you might have to wait until my big reveal to see what they are. The biggest feat this week was building the barn doors I decided to do. In my last post, I was debating if I should add barn doors to the room that I could shut over my mudroom. To be honest, I had always envisioned doing the barn doors there. When we bought the house 2 years ago, I had planned to put the barn doors there. We purchased the hardware, the slab doors and even planned where the thermostat would go in advance so we could add them later. We were so overwhelmed by all the house projects that the barn doors were put at the bottom of our list.

I had no idea what color I wanted them to be or even the design I wanted but that is what I love about the One Room Challenge! It forces me to just make some decisions and go with my gut when I would have just put it off. It is so easy for me to make decisions for my clients,but when it comes to my house sometimes I am at a loss. I guess maybe I just overthink it too much, so here I am now, making some solid decisions!

Let’s chat a bit about the doors we made. In my last post I shared the design I decided to do. I was searching the internet and found some inspiration. I drew the doors up in Auto CAD, found the angles, and put my husband Dave to work on getting all the moulding cut for our new doors.

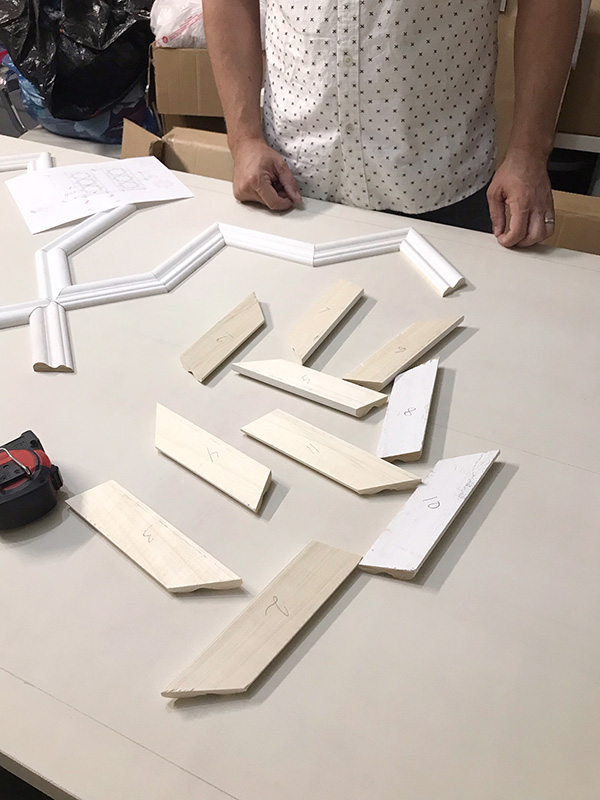
He numbered each piece so we knew where each piece went. It was quite a few cuts and could get very confusing if we didn’t keep them organized. Once we laid out each door, we nailed down all the pieces with a pin nailer. I have a battery operated one and I love it so much. It is so great for little projects like this.

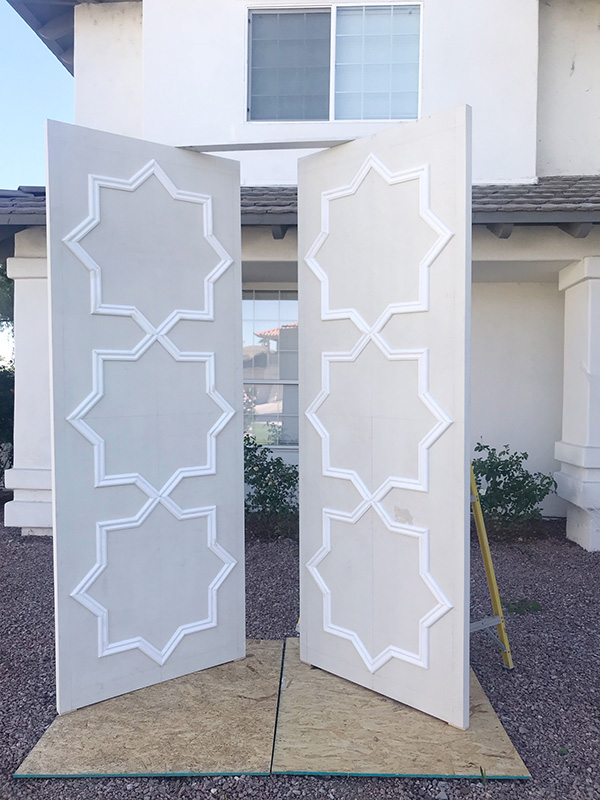
After we nailed all the pieces on, filled the joints an caulked the edges we were ready for paint. I am so in love with the design of the doors. I love how you can be inspired by something and then make it a reality. This is the best part of designing something. When inspiration becomes a reality. The next most important step was selecting the paint color. I have to admit, I was a little nervous about getting the perfect shade that I had in my head. I decided to go with Dunn Edwards: Billiard Table DEA178.

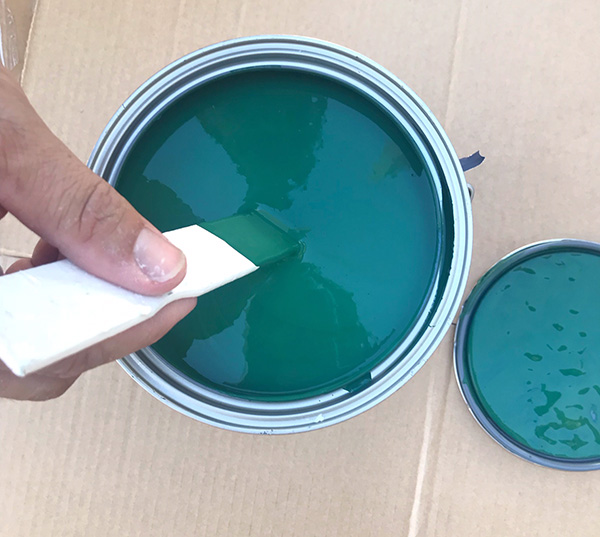
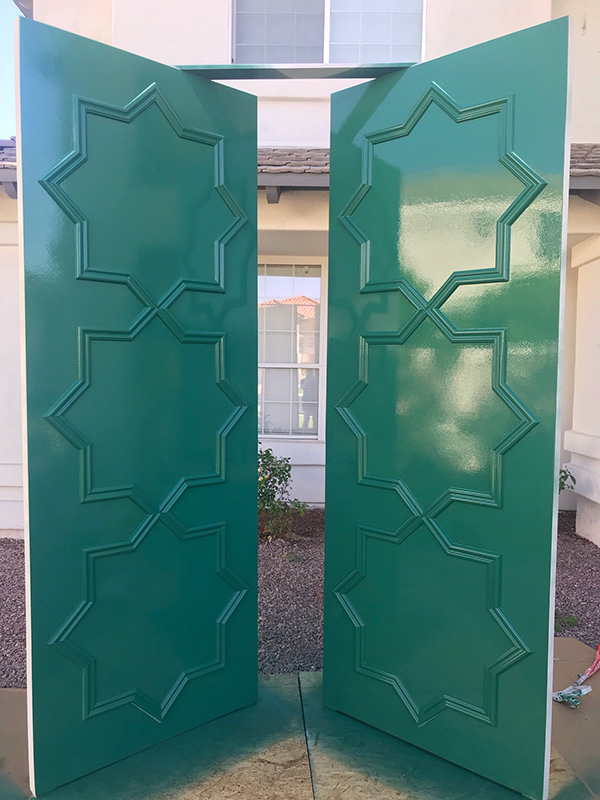
Isn’t it so pretty?? It has just the right hint of blue in it to bring the whole room together. So….. Do you want to see the doors painted? My husband painted them with his airless paint sprayer. I decided to go with a semi-gloss finish because I wanted it to have just a little shine. I honestly cannot wait to see them hung with the satin gold hardware!

That is all I got for this week friends! Are you so excited for the final reveal next week? I know I am!! I can’t wait to show you how everything has come together.

Make sure to check out all the amazing design that all my friends participating in the One Room Challenge are working on as well. There is so much good design happening!!

XO,

Week One       Week  Two   Week Three

   Week Four

Media Partner Better Homes & Gardens| TM by ORC


DIY Pencil Cups | jandjdesigngroup.com

DIY Pencil Cups

Anyone who knows me, knows I am a sucker for office supplies and organizational vessels ha! Target has the best craft isle and every time I head down it, I can’t help myself but pick up some new thing. I found these cute little wood cups that are raw wood and were just screaming my name, so I’m showing how to make these cute little DIY Pencil Cups! These could even be a cute gift to give teacher’s for their desk at school.

DIY Pencil Cups | jandjdesigngroup.com

Hey Jo, wanna craft something??? Why I sure do!

I was working on accessorizing a client’s kitchen and they have the cutest little play table that I had painted navy blue that the kids could do their crafts on. I wanted a cute way to display all their crayons and markers so I made these little cuties.

These are so simple to make anyone can do it. Crafty or not! Here is what you need to get started.

Wood Plant Pots from Target /Rustoleum Gold Spray Paint

Acrylic Paint: Colors of your choice  /Blue Tape

Black Puffy Paint

Paint Brush/  Pencil

DIY Pencil Cups | jandjdesigngroup.com

I started by taping off the containers at a diagonal. The first layer I was masking the parts that I wanted to keep the natural wood. I then painted them with a gold spray paint. The Rustoleom one from Home Depot happens to be my personal favorite of all the gold spray paints.

DIY Pencil Cups | jandjdesigngroup.comI turned the cups upside down when I sprayed them so the top rim would stay the raw wood color.

DIY Pencil Cups | jandjdesigngroup.comNext I pulled off the tape to see what areas were left to add colored paint to.

DIY Pencil Cups | jandjdesigngroup.com

DIY Pencil Cups | jandjdesigngroup.comI then taped the containers again at a diagonal to mask off some of the raw wood areas and some of the gold areas.

Now, I will be sure to have bold lines and still keep some of the gold and wood intact.

DIY Pencil Cups | jandjdesigngroup.comNext, pull off the tape again to reveal all the colors in different interesting patterns. You really can’t go wrong, try not to think about it too much. It usually turns out better that way:)

DIY Pencil Cups | jandjdesigngroup.comLastly, draw on the face you want to add with a pencil first to make sure it is just how you want it. Then draw over the line with black puffy paint and let dry.

DIY Pencil Cups | jandjdesigngroup.com

Finish it off with a coat of Satin clear coat spray paint so it doesn’t mar easily.

And there you have it a cute little pencil cup for a playroom, desk or even for your kitchen.

DIY Pencil Cups | jandjdesigngroup.com

jo signature 2

No Fail Neutral Paint colors

I would say the burning design question I almost always get asked by my friends is what color to paint their interior walls.  This can be a very scary thing! Not only is it costly to paint the whole interior of your house, or a ton of work to do it yourself but if you pick the wrong color you could find yourself slapping yourself silly.

Well her I am with a little friendly advice and some colors that are my personal go to and never have me slapping my head!

Let’s just clear one thing up before we get started. Accent paint walls are a thing of the past. Yea, it adds a little color to your house but keep those in kid’s rooms. Pop in the color in your house on smaller items that you can switch out when you get sick of the particular color that you are committing to.

I do love a good accent wallpaper wall however, the pattern is always a nice addition to any space!

Now that we have that out of the way lets talk Color!

Grey can be one of the toughest tones to select. There are cool greys and there are warm greys. Greys that are cool have a blue undertone and greys that are warm have a brown undertone. If you start mixing cool greys and warm greys they can look a little funny with one another.

This house is painted: Dunn Edwards, Muslin. (Below) This is considered a cooler grey and we pulled the cool grey out of the stone of the fireplace and the wood floors we selected.

maxwell-muslin

Another one of our Favorite Grey Paints is: Dunn Edwards, Fine Grain. (Below) This is a warmer neutral and looks good if you have more brown in your flooring.

fishel-fine-grain

When you are looking to go very light on your interior color but don’t want it quite white, our favorite go to neutral for that is Dunn Edwards: Crystal Haze (below). This always makes the space feel light, bright and fresh.

nisser-crystal-haze

It is always a good idea to grab samples and look at them with your flooring, cabinetry and  things that are going to permanently going to stay in your house. We like to use a flat sheen on the ceilings, satin finish on the walls and a semi gloss finish on doors and baseboards.

Maybe, just maybe I have saved you a little heartache when it comes to painting the interior of your house. Remember, keep it neutral and pop in color with pillows, drapes and accessories.

xox,

jo signature 2

Photos by: John Woodcock Photography

DIY: Floral Terrarium

I seriously love Terrariums and I make them all the time as centerpieces for our client’s tables. I wanted to mix it up a bit and try a floral one. This particular terrarium is great because it gives the look of real flowers without the maintenance or dust (wink wink).

IMG_0092

I started with these great glass containers from IKEA, they have a cute cork top that keeps all the dust out! They are called SINNERLIG and you can find them here or in your local IKEA store.

ikea vase

Here are the supplies you will need to pull off this centerpiece:

  • 5-6 of your favorite faux floral stems (I got mine at Hobby Lobby while they were having their stem sale) I opted for the ranunculus and peonies (some of my personal favorites)
  • Terrarium of your choice (IKEA or Homegoods)
  • wire cutters
  • scissors
  • moss (hobby lobby or Homegoods)
  • glue gun
  • Styrofoam cylinder (hobby lobby)
  • Bag of decorative rocks (hobby lobby)

First, you need to decide how tall you want your middle flower, and the highest point of your arrangement. I tested mine by putting it in my terrarium and adding the top to make sure you could still see it good.

image 2

Place the rest of your flowers in the Styrofoam disc and place your arrangement in a tight bouquet.

Next, hot glue your moss around the base to hide the Styrofoam.

IMG_5918

 IMG_5917

 Place the double sided sticky pad to the bottom of the Styrofoam and place at the bottom.

IMG_5919

Place the arrangement into your terrarium and add your rocks and extra moss around the base of your arrangement.

IMG_5920

Place on your lid (if you have one) and voila! You have the very fanciest floral terrarium on the block!

IMG_0092

Happy Crafting!!

xo,

jo